Web Service Management Locate
Overview Locate
You can use the Administration Console to enable/disable a service, invoke a service, manage interceptors, publish a service to UDDI, or enable/disable other features. Checklists of the procedures for using each of these functions follow.
All of these functions are accessed from the Web Services Management form. To load this form:
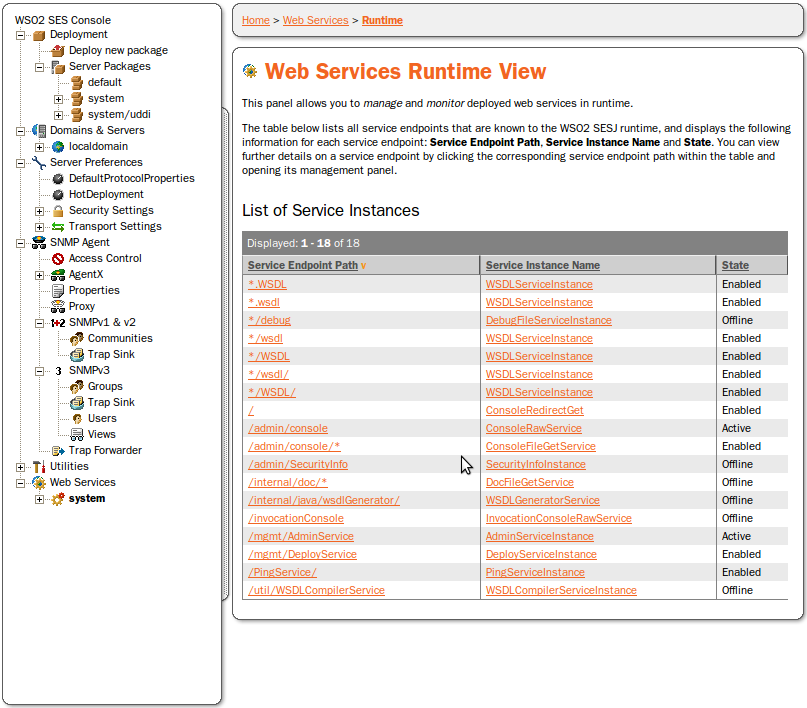
Click on the Web Services tree node of the Administration Console screen. This returns the Runtime View, which contains a table listing all service endpoint and instance names. (Please see Figure 21).
Click on either an endpoint or an instance name to load the Web Services Management form for that service.
Enabling and Disabling a Service Locate
Follow these steps to enable or disable a service.
Click on the Web Services tree node of the Administration Console. This loads the Runtime View.
Click on either the service endpoint path or the service instance name of the service you wish to enable or disable. (see Figure 21). This loads the Web Services Management form.
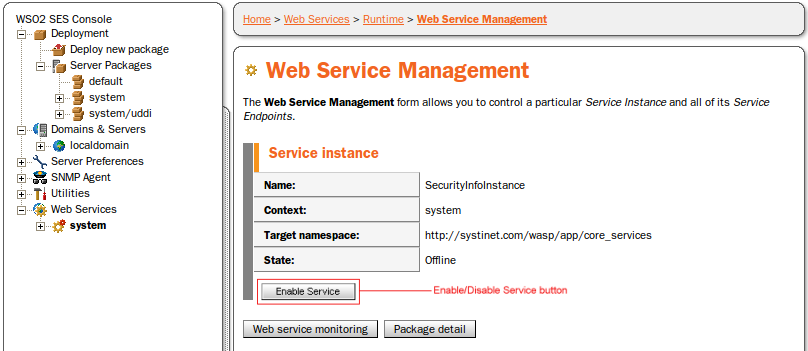
At the top of the Web Services Management form is a section for managing service instance. It will contain a button marked either Enable Service if the service is disabled, or Disable Service if the service is enabled (see Figure 22). Press the button to change the state of the service.
Invoking Services from the Console Locate
Deployed Web services can be invoked from the Administration Console. This allows you to test the Web service without creating a client for it -- your Web browser functions as the client.
![[Important]](images/important.gif) | Important |
|---|---|
The Invocation Console does not support RPC-encoded Web services. | |
Follow these steps to invoke a deployed service:
Click on the Web Services tree node of the Administration Console. This loads the Runtime View.
Click on either the service endpoint path or the service instance name of the service you wish to invoke. (see Figure 21). This loads the Web Services Management form.
Find the Invocation Console section under Service Endpoint. Press the button marked Invocation Console. This opens a new window showing all the operations that can be invoked.
As an example, lets have a look at the SecurityInfoService. The invocation console for this service is in Figure 23.
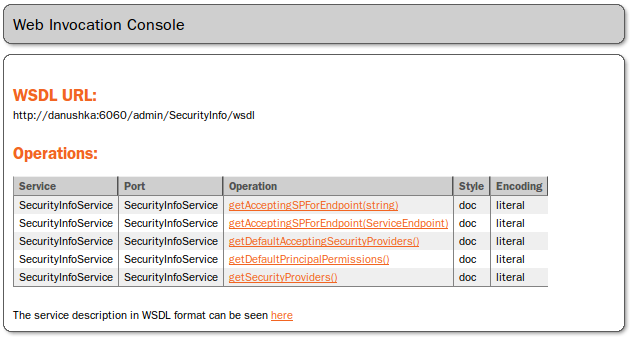
To illustrate the console's function, we have chosen to invoke getAcceptingSPForEndpoint operation. Pressing getAcceptingSPForEndpoint(string) under Operations returns the form in Figure 24
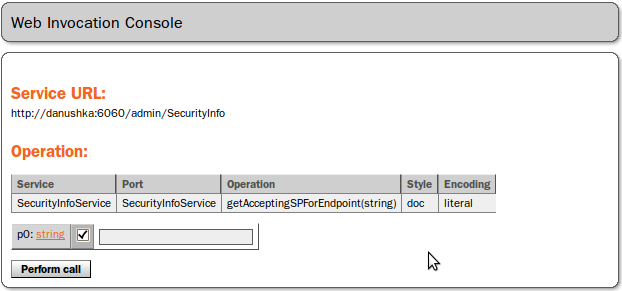
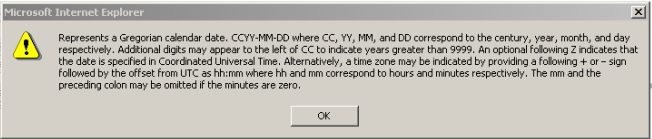
In Figure 24, all required fields are indicated by a tick in the check box next to them. Dragging the cursor over the check box also indicates whether a field is mandatory or optional. Dragging the cursor over a field calls up a tooltip showing what format the field entry must be in, as shown in Figure 25. Clicking on the name of a data type opens a window with more detailed information about the format for entering that data type. In Figure 26, date has been clicked on.

The completed form is shown in Figure 27.

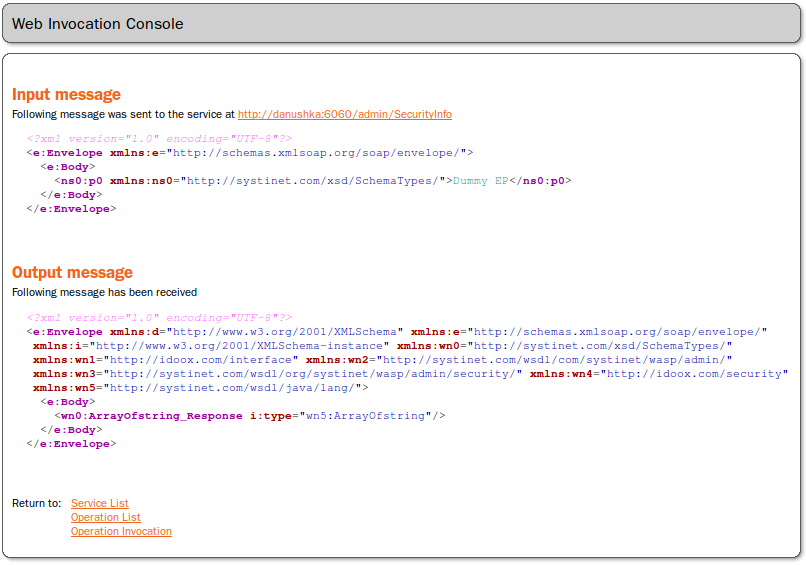
When the form is completed, press the Perform Call button. This returns the exchange of SOAP messages between the 'client' and the service. Our call has returned the SOAP messages in Figure 28. Note that from the SOAP message page, you can navigate either to a list of deployed services to invoke, a list of operations to perform on this service (as in Figure 23) or the form for the operation you have just performed.
Managing Interceptors Locate
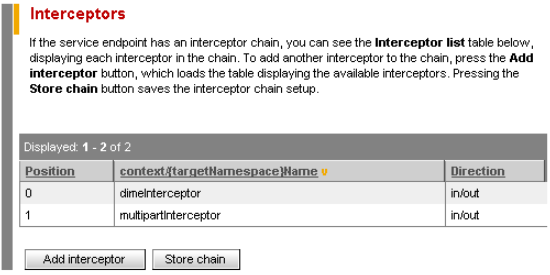
Interceptors are also managed from the Web Service Management form. If a service endpoint has an interceptor chain, the Interceptors List will display all the interceptors.
To remove an interceptor, click Remove at the end of its row in the table.
To add an interceptor, click the Add Interceptor button. Click the Store Chain button to save changes (as shown in Figure 29).
Message Size, Polymorphism and IP Filtering Locate
Message size limits, polymorphic (de)serialization support, and IP address filtering are all enabled/disabled from the Web Services Management form. (See Overview for instructions on loading this form.) Enabling IP address filtering loads the IP Filter Settings form. On this form, you may allow or deny access to specified IP addresses and netmasks.