Soap Spy Locate
Overview Locate
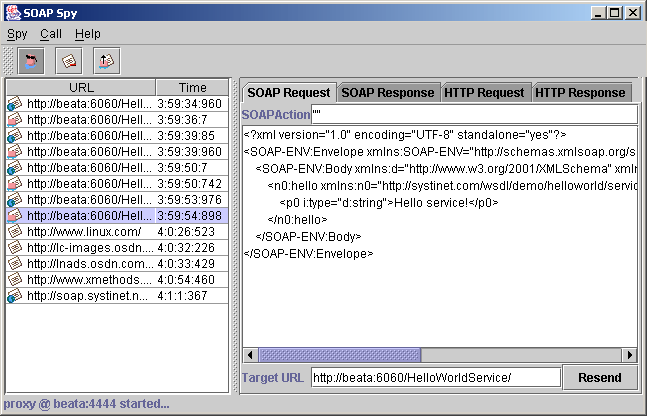
During debugging, it can be useful to track communication between the client and server. SOAPSpy allows the inspection of messages that the client and server exchange. Messages, or more precisely, requests and responses, are coupled to calls. Figure 14 shows the SOAPSpy dialog box.
SoapSpy is included in the Core-Tools component. It is accessible through the SoapSpy script in the bin subdirectory of the WSO2 SOA Enablement Server distribution.
SOAPSpy works as an HTTP proxy server. It accepts HTTP requests from clients and resends them to final destinations (or another HTTP proxy server). SOAPSpy can track not only SOAP and WSDL messages, but also any other documents (HTML pages, binary data, etc.). However, the binary data is shown only schematically; all invalid text characters are translated into the '?' character. SOAPSpy can also work as an HTTP server client: you can make it contact another proxy server instead of connecting to the final destination.
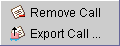
Saving calls to file You can save the text of a call caught by SoapSpy to a file. Select the message you wish to save from the menu in the left window. Then either click the Export Call icon or select Export Call from the Call menu, as shown in Figure 15. A Save As... dialog appears. Enter the path and filename and press Enter.
Running SOAPSpy Locate
This tool is placed in the bin subdirectory of your WSO2 SOA Enablement Server distribution. To start SOAPSpy, enter SoapSpy.bat on a Windows platform or ./SoapSpy on UNIX platforms.
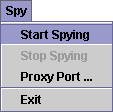
Spying must be started first by selecting Start Spying from the Spy menu or by clicking the spy icon in the main pane Figure 16.

The lower part of the window contains a status bar Figure 17 with information about the state of the tool. Once started, the status line displays the proxy host and port number.
The following options can be used on the command line when activating SOAPSpy:
- --port portNumber
Starts SOAPSpy at the given port
- --help
Prints a list of these options to the screen
- --version
Shows the version of SOAPSpy on the console
To make SOAPSpy contact another proxy server instead of making a direct connection to the destination, use the standard Java system properties for HTTP proxies:
-Dhttp.proxyHost=PROXY_HOST
The host name of the proxy server
-Dhttp.proxyPort=PROXY_PORT
The port of the proxy server
Load the tool with one of the following sets of commands:
./SoapSpy
SoapSpy.bat
./SoapSpy --port 6969
How to Run WSO2 SOA Enablement Server Examples Using SOAPSpy Locate
Once SOAPSpy is running and spying has been enabled, we can run the Hello World demo by running these commands:
cd %WASP_HOME/demo/basic/hello
run make_service
run deploy_service
run make_client
run spy_client
After entering run spy_client, the intercepted messages appear in the SoapSpy application, as follows:
<?xml version="1.0" encoding="UTF-8"?>
<!DOCTYPE SOAP-ENV:Envelope PUBLIC
<SOAP-ENV:Envelope xmlns:SE="http://schemas.xmlsoap.org/soap/encoding/"
    xmlns:SOAP-ENV="http://schemas.xmlsoap.org/soap/envelope/"
    xmlns:xsd="http://www.w3.org/2001/XMLSchema"
    xmlns:xsi="http://www.w3.org/2001/XMLSchema-instance">
    <SOAP-ENV:Body>
        <ns0:p0 xmlns:ns0="http://wso2.com/xsd/SchemaTypes/"
                xsi:type="xsd:string">Hello!</ns0:p0>
    </SOAP-ENV:Body>
</SOAP-ENV:Envelope>
![[Note]](images/note.gif) | Note |
|---|---|
To intercept conversations between the client and the Web service, the property systinet.demo.server.url in the client application needs to be set to a real computer name instead of localhost. Otherwise, the Java virtual machine bypasses the proxy. For the run spy_client command to work, SoapSpy must be running on its default port, 4444. | |
Using SOAPSpy Locate
The program consists of a call list and a message viewer.
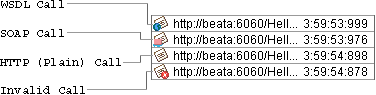
Received calls are stored in a list on the left side of the window. Calls can be selected and examined. Unwanted calls can by removed from the list using the Call menu or context pop-up.
The message viewer displays the selected call, as shown in Figure 18. Every call contains HTTP Request and HTTP Response tabs, which contain raw data caught by SOAPSpy. SOAP calls contain two specific panels, SOAP Request and SOAP Response, for advanced manipulation of SOAP messages. The same applies for WSDL calls.
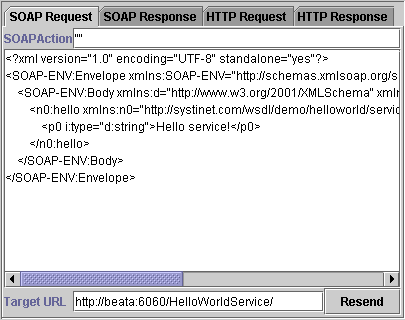
SOAP Request Tab Locate
The SOAP Request tab (Figure 19) consists of the SOAP Action, SOAP message and Target URL where the original request was sent. Every file can be edited. Pressing the Resend button can produce a new HTTP request. The resent request appears in the call list.
How to Run WSO2 SOA Enablement Server Clients Using SOAPSpy Locate
Java system properties http.proxyHost and http.proxyPort need to be set. Use the command java -Dhttp.proxyHost=COMPUTER_NAME -Dhttp.proxyPort=4444... before running SoapSpy.