The PStore Tool - GUI Version Locate
The PStore Tool manipulates the protected store. The protected store consists of the user store and the key store. You can add, edit or remove any user properties in the user store. You can also add, edit and remove certificates and identities in the key store. You can do all of this with a local file containing the protected store, or do it remotely via SOAP .
![[Note]](images/note.gif) | Note |
|---|---|
Much of this fuctionality is accessible from the administration console Web interface, which enables remote management of the protected store. The PStoreTool is more powerful, however, and can be used for client as well as server protected stores. | |
Running the GUI PStore Tool Locate
The GUI PStore Tool is stored in the bin subdirectory of the WSO2 SOA Enablement Server distribution. Start it with this command:
..\server_java\binPStoreTool gui
Opening and Closing the Protected Store Locate
Opening Protected Store from a File Locate
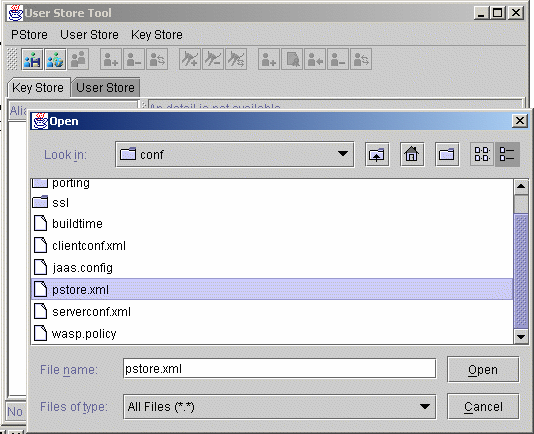
The GUI PStore Tool can manipulate every protected store in a file. To manipulate the client's protected store, open clientconf.xml. To open the server protected store, open pstore.xml.
To open protected store from file, select Open From File... from the PStore menu. This returns the file chooser dialog. Select the file you want to open as shown in Figure 33.
Opening Protected Store Remotely Locate
The GUI PStore Tool can edit the protected store remotely via SOAP.
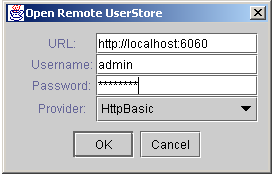
To open protected store remotely, select Open Remote from the PStore menu. This menu entry opens a dialog in which you can specify connection information:
URL - URL for the running WSO2 SOA Enablement Server Server you want to manage.
Username - Name of user who can access protected store remotely.
Password - Password for specified username.
Provider - Security provider used for secure communication with WSO2 SOA Enablement Server. The default value is HttpBasic; this value is set during WSO2 SOA Enablement Server installation.
If the specified information is valid, the protected store will be opened for editing.
Closing Protected Store Locate
To close the protected store, select Close from the PStore menu.
Open Next Protected Store Locate
In some cases you need to work with more than one protected store at the same time. Typically you want to copy certificates from one protected store to another. To open another protected store, select the New Window from the PStore menu. New windows appear. Now you can open the protected store from a file or remotely.
Copy Data Between Protected Stores Locate
With the PStore Tool, you can manipulate more than one protected store at the same time. You can simply copy identities, certificates, users, and user properties from one protected store to another using the Copy and Paste actions located in context menus of Aliases, Users, and Properties panels.
| Note |
|---|---|
When you copy data from one area to another, the Paste action is be disabled for some categories of data. This means that data may be copied, but cannot be pasted to the selected area. For example, the password property from the user store cannot be pasted to the key store. | |
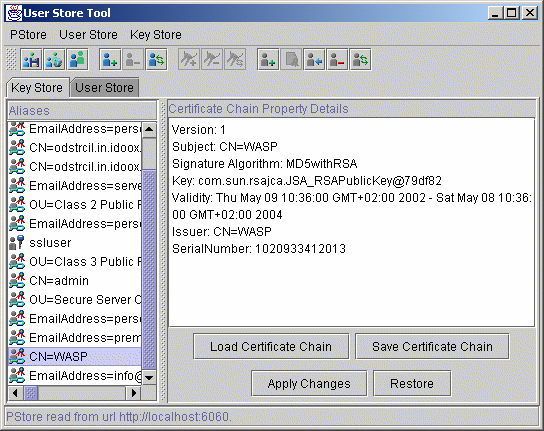
Key Store Locate
To work with the key store, select the Key Store tab. This tab has two panels. The left side has a list of all entries. The right has detailed information for the selected entry.
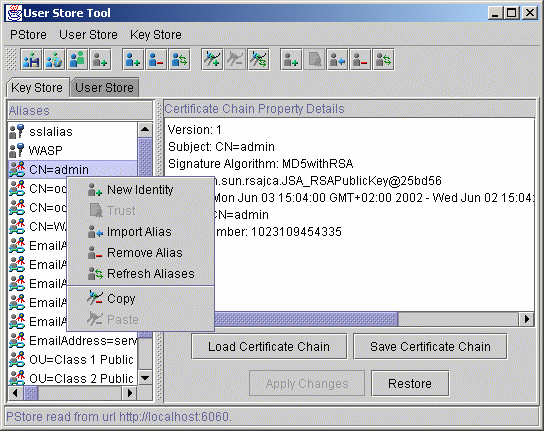
Create New Identity Locate
To create a new identity, select New Identity... from the Key Store menu. This opens a dialog for information such as Alias, Distinguished Name, and Password. (The Distinguished Name is not mandatory.) If the specified information is valid, the new identity will be added to the key store with the specified Alias. Otherwise an error dialog will be returned.
Key Store Trust Locate
If you want to trust key entry select Trust from the Key Store menu. This action is available only for key entry type.
Import Alias Locate
To import a certificate from a file into the key store, select Import Alias from the Key Store menu. This opens a dialog in which you can specify Alias, Type, and value that depends on the entry type. In the current implementation, you can import only the certificate chain entry type.
Remove Alias Locate
To remove an alias from the key store, select the alias you want to remove and select Remove Alias from the Key Store menu. You can remove several aliases at once.
Refresh Aliases Locate
To synchronize information shown in this tool with the original key store source, perform a refresh by selecting Refresh Aliases from the Key Store menu. This is useful when you are accessing a protected store remotely.
Alias Details Panel Locate
It is not surprising that the Details panel has more details about the selected alias. This panel shows details that depend on the entry type. You can also change this value. If you want to store a new value, press the Apply Changes button. Or, to return to the original value, press Restore.
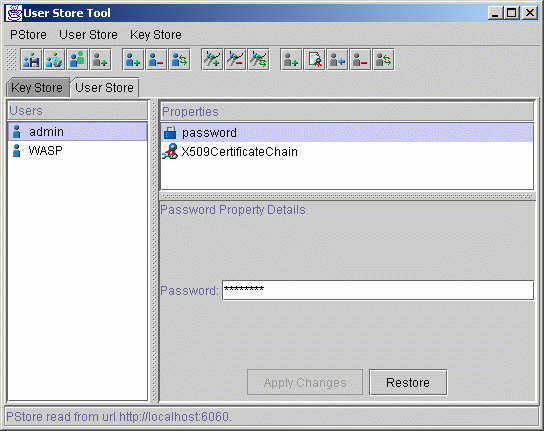
User Store Locate
There are three panels on the User Store tab. The left side has a list of all entries. On the right top are properties available for the selected user. On the right bottom is detailed information for the selected user property.
Add User Locate
To add a new user, select Add User from the User Store menu. This opens a dialog for entering the Username. Press OK when done.
Remove User Locate
To remove a user from the user store, select the user you want to remove and choose Remove User from the User Store menu. You can remove several users at once.
Refresh Users Locate
Refresh synchronizes informations shown in this tool with the original user store source. To refresh, select Refresh Users from the User Store menu. This is useful when you are accessing a protected store remotely.
Add Property Locate
To add a new user property, select User Store → Properties → Add Property. This returns a dialog for the property you want to create and its value.
Remove Property Locate
To remove one or more user properties from the user store, select them and choose User Store → Properties → Remove Property from the menu.
Refresh Properties Locate
To synchronize informations on the properties panel with the original user store source, perform a refresh. Select User Store → Properties → Refresh Properties. This is useful when you are accessing a protected store remotely.
User Properties Details Panel Locate
The Details panel has more information about user properties that depend on the property type. Select the property you want to see. You can also change this value. If you want to store a new value press Apply Changes. Or, to return to the original value, press Restore.